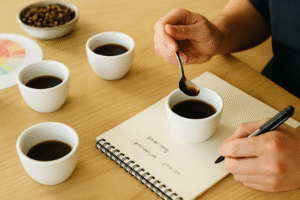
If you’ve ever watched a barista slurp coffee from a spoon at a café or roastery, you’ve witnessed a ritual called cupping—a standard method used to taste and evaluate coffee.
Though it may look technical or intimidating, cupping is actually one of the most accessible ways to develop your coffee palate and better understand what you’re drinking.
You don’t need special equipment or professional training to start. With a few simple tools and a sense of curiosity, anyone can learn the art of tasting coffee with intention.
In this guide, you’ll learn what cupping is, how to set up your own tasting session, and how to describe the flavors, aromas, and textures in your cup like a pro.
What Is Coffee Cupping?
Cupping is a systematic tasting method used to evaluate coffee for quality, consistency, and flavor. It’s the industry standard used by farmers, roasters, buyers, and baristas worldwide.
Unlike typical brewing, cupping is done without filters or machines. It uses immersion and direct contact between ground coffee and hot water in a small bowl or cup.
The process emphasizes the pure flavor profile of a coffee—without interference from brewing variables like paper filters, pressure, or temperature curves.
Why Cupping Matters
Cupping helps you:
- Compare different coffees side-by-side
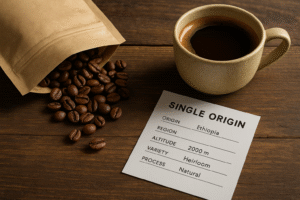
- Learn how origin, processing, and roast affect taste
- Detect defects or off-flavors
- Identify your own flavor preferences
- Communicate about coffee using shared language
It’s not just for professionals—home brewers can use cupping to build their palate and better enjoy every cup they make.
What You Need to Start Cupping
You don’t need expensive gear to get started. Here’s a basic list:
- Whole bean coffee (2 or more types)
- Burr grinder (grind medium-coarse)
- Bowls or wide cups (150–200 ml capacity)
- Hot water (around 93°C or 200°F)
- Cupping spoons or soup spoons
- Scale (optional but useful)
- Timer
- Tasting notes sheet or notebook
- Fresh palate (avoid strong flavors before cupping)
If possible, use a consistent ratio—about 12g of coffee to 200ml of water—to ensure fair comparisons.
Step-by-Step: How to Cup Coffee
1. Grind the Coffee
Grind your coffee beans to a medium-coarse consistency, like coarse sea salt. Use the same grind for each sample to ensure fair tasting.
Place the grounds into separate cups or bowls. Smell the dry grounds and note the initial aroma.
2. Add Hot Water
Pour hot water (just off the boil) over each sample, fully saturating the grounds. Start your timer.
Let the coffee steep for 4 minutes. During this time, a crust will form on the surface.
3. Break the Crust
At 4 minutes, use your spoon to gently “break” the crust by stirring the top. This releases trapped gases and volatile aromas.
Smell deeply—this is when the wet aroma is most intense. Rinse your spoon afterward.
4. Skim the Surface
Use a spoon to remove the remaining floating grounds or foam. This creates a clean surface for tasting.
Wait another 4–5 minutes for the coffee to cool slightly. Cupping is usually done at warm—not hot—temperatures to better detect subtle flavors.
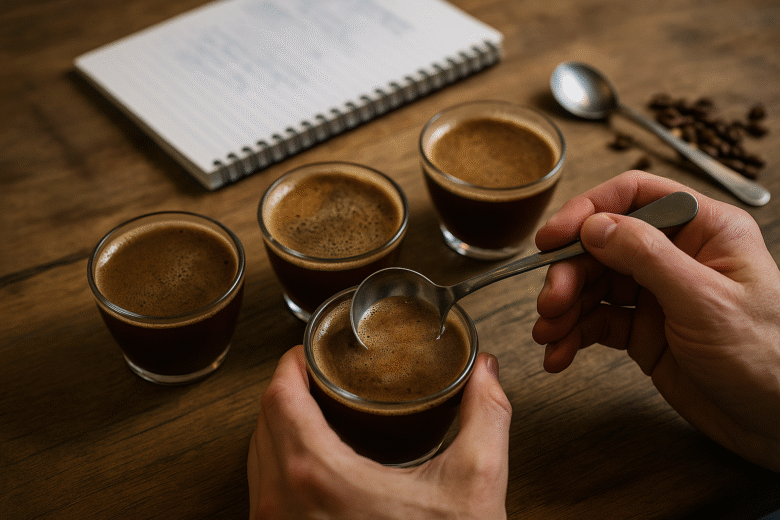
5. Taste and Slurp
Dip your spoon into the cup and slurp the coffee quickly into your mouth. Slurping aerates the liquid and spreads it across your palate.
Note the flavor, acidity, sweetness, bitterness, body, and aftertaste.
Rinse your spoon between samples to avoid mixing flavors.
What to Look For When Tasting
Use your senses to evaluate the coffee. Here are the key attributes to observe:
Aroma
- Dry: smell the grounds before adding water
- Wet: smell after breaking the crust
- Look for floral, fruity, nutty, spicy, or earthy notes
Acidity
- Not sourness, but brightness or liveliness
- High acidity = juicy, citrusy, sparkling
- Low acidity = mellow, smooth, flat
Sweetness
- Balance to acidity and bitterness
- Think caramel, sugarcane, honey, ripe fruit
Body
- The texture or mouthfeel
- Light body = tea-like
- Heavy body = creamy, syrupy, oily
Flavor
- The combination of all sensations
- Specific notes like berry, chocolate, almond, or lemon
- Focus on the start, middle, and finish of the sip
Aftertaste
- What lingers after swallowing
- Short, long, clean, bitter, sweet, dry, or pleasant
Take your time. Let the coffee cool as you continue to taste—it will reveal different notes at different temperatures.
Using a Flavor Wheel
The SCA Coffee Taster’s Flavor Wheel is a helpful tool for identifying and naming coffee notes. It moves from broad categories (like fruity or nutty) to specific terms (like red apple or hazelnut).
If you’re new to tasting, start with general impressions: fruity or chocolaty? Sweet or bitter? Then get more specific over time.
The wheel also helps you expand your vocabulary and communicate more precisely with others.
Recording and Comparing
Use a notebook or tasting form to record:
- Coffee name, origin, and roast
- Grind and brew details
- Flavor notes
- Acidity, body, and finish
- Overall impression
Cupping multiple coffees side-by-side lets you directly compare their differences. This trains your palate faster than tasting them on separate days.
Cupping Etiquette
If cupping with others, especially in a professional setting:
- Don’t double-dip spoons
- Keep the cupping area clean
- Respect others’ observations—taste is personal
- Avoid wearing strong scents (they interfere with aroma)
- Be open to learning and sharing
At home, cupping is more relaxed—but keeping good habits helps you get better results.
Practice Makes Palate
The more you taste, the better you’ll get at identifying flavors and textures. Here are tips to keep improving:
- Cup coffees from different origins and roast levels
- Cup the same coffee at different temperatures
- Practice identifying individual flavor groups
- Pair cupping with eating fruit, chocolate, nuts, etc.
- Taste with friends and share impressions
Over time, your brain starts to associate flavors with patterns. You’ll recognize a Kenyan’s blackcurrant or a Brazilian’s nuttiness with ease.
Beyond Cupping: Applying What You Learn
Cupping trains you to taste better, but it also informs your daily brewing. After cupping:
- Choose beans that match your taste
- Adjust your brewing method to highlight certain notes
- Talk more confidently with baristas or roasters
- Appreciate the complexity of each cup you brew
You’ll notice details you used to miss—like acidity, finish, or how coffee changes as it cools.
Cupping also deepens your respect for the work behind every bean—from farm to roastery to your kitchen.
Conclusion: Taste with Intention
Cupping is more than a routine—it’s a way to connect with coffee on a deeper level. It slows you down, sharpens your senses, and teaches you to taste with purpose.
You don’t need to be a sommelier or expert. You just need curiosity, attention, and a willingness to explore.
So next time you brew, take a moment to sip slowly. Think about what you’re tasting. You might find fruit, chocolate, flowers—or something entirely unexpected.

Marcio Luzardo is a coffee enthusiast and the voice behind Tudo Viraliza. With a passion for turning curiosity into practical knowledge, he shares easy-to-follow tips, guides, and insights to help readers enjoy better coffee every day. When he’s not writing, Marcio is exploring new brewing methods or diving into the rich stories that connect coffee to culture, lifestyle, and wellness.